Before trying to match old aluminum siding, contractors need accurate measurements. Learn how to measure siding exposure, panel height, butt depth, lock geometry, nailing hem and texture so you can compare an existing panel with current replacement options.
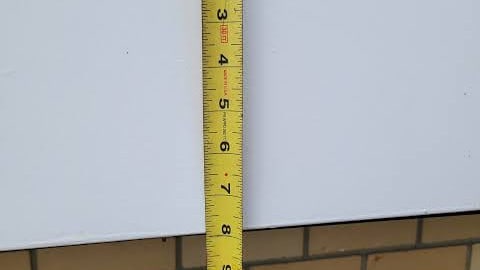
How to Measure an Existing Aluminum Siding Profile
Matching old aluminum siding starts with good measurements.
A contractor can look at a piece of siding and think, "That's probably Double 4," but "probably" is not good enough when you're ordering material for a repair.
Two siding panels can look very similar from the front and still have different exposure, butt depth, locking geometry or overall dimensions.
At Suburban Wholesale & Supply, we encourage contractors to measure the complete profile before comparing an older siding panel with current Gentek aluminum products or other replacement options.
Start With a Full Piece Whenever Possible
The best sample is a complete panel section that includes the nailing hem, face, butt and locking edge.
A broken piece from the middle of the panel may tell you the color and texture, but it may not tell you whether a current panel can actually connect to the existing siding.
Identification Rule: The more complete the sample, the more confident you can be in the comparison.
Tool #1: Tape Measure
A basic tape measure will handle most of the initial measurements.
Use it for:
- Visible exposure
- Total panel height
- Distance between profile breaks
- Overall width of the sample
Tool #2: Calipers
Calipers can make the inspection more precise.
They are useful for measuring:
- Butt depth
- Lock dimensions
- Small bends and lips
- Panel thickness where practical
You do not always need calipers for a basic profile match, but they can be valuable when two products are very close.
Step 1: Measure the Visible Exposure
Exposure is the amount of each siding course that remains visible after installation.
This is usually the first measurement contractors should take.
Common examples include:
- 4-inch exposure
- 5-inch exposure
- 8-inch exposure
If the panel has two exposures, measure one exposure and then confirm the second.
Understand Double Profiles
A Double 4-inch profile does not mean the entire panel is only 4 inches tall.
It means the panel creates two 4-inch siding courses.
Likewise, a Double 5-inch profile creates two 5-inch siding courses.
Double 4 = two 4-inch exposures.
Double 5 = two 5-inch exposures.
Step 2: Measure the Total Panel Height
Measure from the top of the nailing hem to the bottom of the locking edge.
This gives you the total manufactured height of the panel.
This measurement can help distinguish between panels that have similar visible exposures but different locking or nailing systems.
Step 3: Measure the Butt Depth
The butt is the lower projecting edge of the siding course.
Measure how far that edge projects from the plane of the panel.
Butt depth affects both appearance and compatibility.
A deeper butt generally creates a stronger shadow line.
Don't assume two Double 4 panels are identical just because the exposure matches. Butt depth can be different.
Step 4: Measure the Profile Breaks
On double profiles, measure where the first course transitions into the second.
This helps confirm whether the panel is truly symmetrical and whether both exposures are the same.
It also gives you more data to compare against a current product specification.
Step 5: Inspect the Locking Edge
This is one of the most important parts of the entire identification process.
The locking edge determines how one panel connects to the panel below it.
Inspect:
- Shape of the lock
- Depth of the lock
- Width of the locking lip
- Angle of the bend
- Any hook or return edge
Two panels can match visually and still fail to connect because the locks are different.
Matching color without matching the lock does not create a usable repair.
Step 6: Inspect the Nailing Hem
The nailing hem can provide additional clues.
Compare:
- Height of the hem
- Slot size
- Slot spacing
- Shape of the upper edge
- Distance from the hem to the first profile break
These details can help confirm whether a replacement panel is truly compatible.
Step 7: Identify the Texture
Measure the profile—but also document the surface.
Is it:
- Smooth
- Woodgrain
- Embossed
- Lightly textured
Texture can be just as important as profile when trying to create a visually acceptable repair.
Step 8: Look for Manufacturer Markings
Turn the panel over and inspect the back.
Look for:
- Manufacturer name
- Product code
- Color code
- Production information
- Ink stamps
- Embossed markings
Even a partial code can sometimes make identification easier.
Step 9: Photograph the Profile From the Side
Take a clear side-profile photograph.
A side view can document the panel shape better than a front photograph alone.
Take:
- Front view
- Back view
- Side profile
- Close-up of the lock
- Close-up of the nailing hem
Step 10: Record the Measurements
Do not rely on memory.
Write down:
- Exposure
- Total panel height
- Butt depth
- Distance between profile breaks
- Lock dimensions
- Nailing hem dimensions
- Texture
- Any manufacturer markings
A complete set of measurements is much easier to compare than a vague description over the phone.
Build a Simple Profile Measurement Sheet
| Measurement | Existing Panel |
|---|---|
| Visible Exposure | __________ |
| Total Panel Height | __________ |
| Butt Depth | __________ |
| Profile Break | __________ |
| Lock Depth | __________ |
| Lock Width | __________ |
| Texture | __________ |
| Manufacturer Marking | __________ |
Compare the Profile With Current Gentek Products
Once the measurements are complete, compare them with current Gentek aluminum siding profiles.
Current product families may include:
- Deluxe Aluminum
- Woodgrain Series 2000
- Cedarwood Aluminum
The comparison should include both dimensions and lock compatibility.
Do a Physical Lock Test When Possible
Measurements can get you close.
A physical test is better.
If you have a current sample available, try connecting the old panel to the new sample.
Do not force the connection.
If two profiles need to be forced together, they are probably not a proper match.
Don't Forget the Color
Profile identification is only half the repair problem.
Once you identify a compatible profile, compare current color options.
Remember that older siding may have weathered, faded or chalked, so a new panel may not visually match even if the original color name still exists.
Compare a Hidden Area for Original Color
If possible, inspect a less-weathered section of the old panel.
Areas hidden behind an overlap or trim piece may give you a better indication of the original color than the exposed face.
Don't Measure Only One Piece if the House Is Available
If you're at the jobsite, verify the profile in more than one location.
Older homes may have repairs or additions that use different siding on different elevations.
Measure the actual wall being repaired.
Watch for Mixed Siding Profiles
Do not assume the entire house uses one siding profile.
Mixed conditions can occur because of:
- Additions
- Previous repairs
- Garage additions
- Storm damage
- Partial remodeling
Document each different profile separately.
A Simple Field Measurement Process
- Photograph the siding on the house.
- Remove or obtain a complete sample when practical.
- Measure the visible exposure.
- Measure total panel height.
- Measure the butt depth.
- Measure profile breaks.
- Inspect the locking edge.
- Inspect the nailing hem.
- Identify smooth or woodgrain texture.
- Look for manufacturer markings.
- Take close-up profile photographs.
- Record all measurements.
- Compare with current product specifications.
- Physically test compatibility when possible.
- Then compare color.
A Better Counter Explanation
"Before we try to match this, we need to measure more than just the face. We'll check the exposure, total panel height, butt depth, locking edge and nailing hem. Then we'll compare the profile with current products. If the dimensions and lock are compatible, we'll move on to the color comparison. That gives us a much better chance of identifying a workable repair."
Avoid the "Looks Close Enough" Mistake
This is where contractors can get into trouble.
A panel may look nearly identical while sitting on the counter.
That does not mean it will connect properly on the wall.
Measure first. Compare second. Test compatibility third. Order last.
Get Help Identifying Aluminum Siding at Suburban Wholesale & Supply
Suburban Wholesale & Supply works with professional siding contractors throughout Davenport, Bettendorf, Moline, Rock Island and the surrounding Quad Cities, Eastern Iowa and Western Illinois.
If you're trying to identify an older aluminum siding profile, bring the most complete sample available along with project photos and measurements.
Our team can help compare the sample with current Gentek aluminum siding products and determine whether a practical profile match may be available.
Sources & Additional Resources
- Gentek Building Products — Deluxe Aluminum Siding: Current profile, exposure, texture and product information for comparison with existing aluminum siding.
- Gentek Building Products — Woodgrain Series 2000 Aluminum Siding: Current Double 4-inch profile, texture and product information.
- Gentek Building Products — Cedarwood Aluminum Siding: Current Double 5-inch aluminum siding profile and product information.
- Gentek Building Products — Product Directory: Current siding profile, specification and color information for Gentek aluminum products.
- The Aluminum Association — Building & Construction: Industry information regarding aluminum exterior building products and material characteristics.
- Vinyl Siding Institute: General siding installation and profile terminology resources useful for understanding exposure, courses and exterior cladding layout.
Part of: Estimating & Ordering
More in Estimating & Ordering
- Gentek Aluminum Siding Pre-Order Checklist
- How to Avoid Jobsite Material Shortages | Suburban Wholesale & Supply
- How to Estimate Vinyl Siding Materials | Suburban Wholesale & Supply
- Daily Jobsite Material Delivery | Suburban Wholesale & Supply
Upload your HOVER report and our wholesale team will turn it into a material quote within 24-48 hours. For next-day delivery, get your order in by 3pm the day before.
Share This Post
Share it on Facebook or X, or send it through your device share sheet for Instagram.